castiron

Tina Marie-style Tri-Tip

A couple of years ago, I stopped at the City Meat Market in Naperville. It was the first time I tried a tri-tip roast,Santa Maria-style, and it was amazing! Sadly, City Meat Market closed at the end of 2013, but I still remember that roast!

A couple of weeks ago, I bought another tri-tip. I did a search for “Santa Maria-style” rub and there were several variations. This is my version of the rub so I’m calling it the Tina Marie-style Tri-tip.

Here is the recipe:

  • ¼ cup canola oil
  • 1 ½ - 2 lb tri-tip roast
  • Equal parts garlic powder, paprika, cayenne pepper and black pepper (maybe 1 tablespoon each)
  • ½ tablespoon kosher salt

Combine all of the spices. Rub the roast first with the canola oil, then the spice mixture. Let the roast sit covered in the refrigerator for at least 4 hours or as long as overnight.

Start the grill and get it as hot as you can (600-700 degrees). Sear the roast on direct heat for approximately 2-3 minutes per side. Move the roast to indirect heat and cook until the roast reaches an internal temperature of 135-140 degrees (140 degrees for medium). Remove the roast from the grill, cover with foil and let sit for approximately 10 minutes. Even if you like your beef well done, PLEASE remove it from the heat at 140 degrees. The carry over cooking will bring the roast to the perfect temperature.

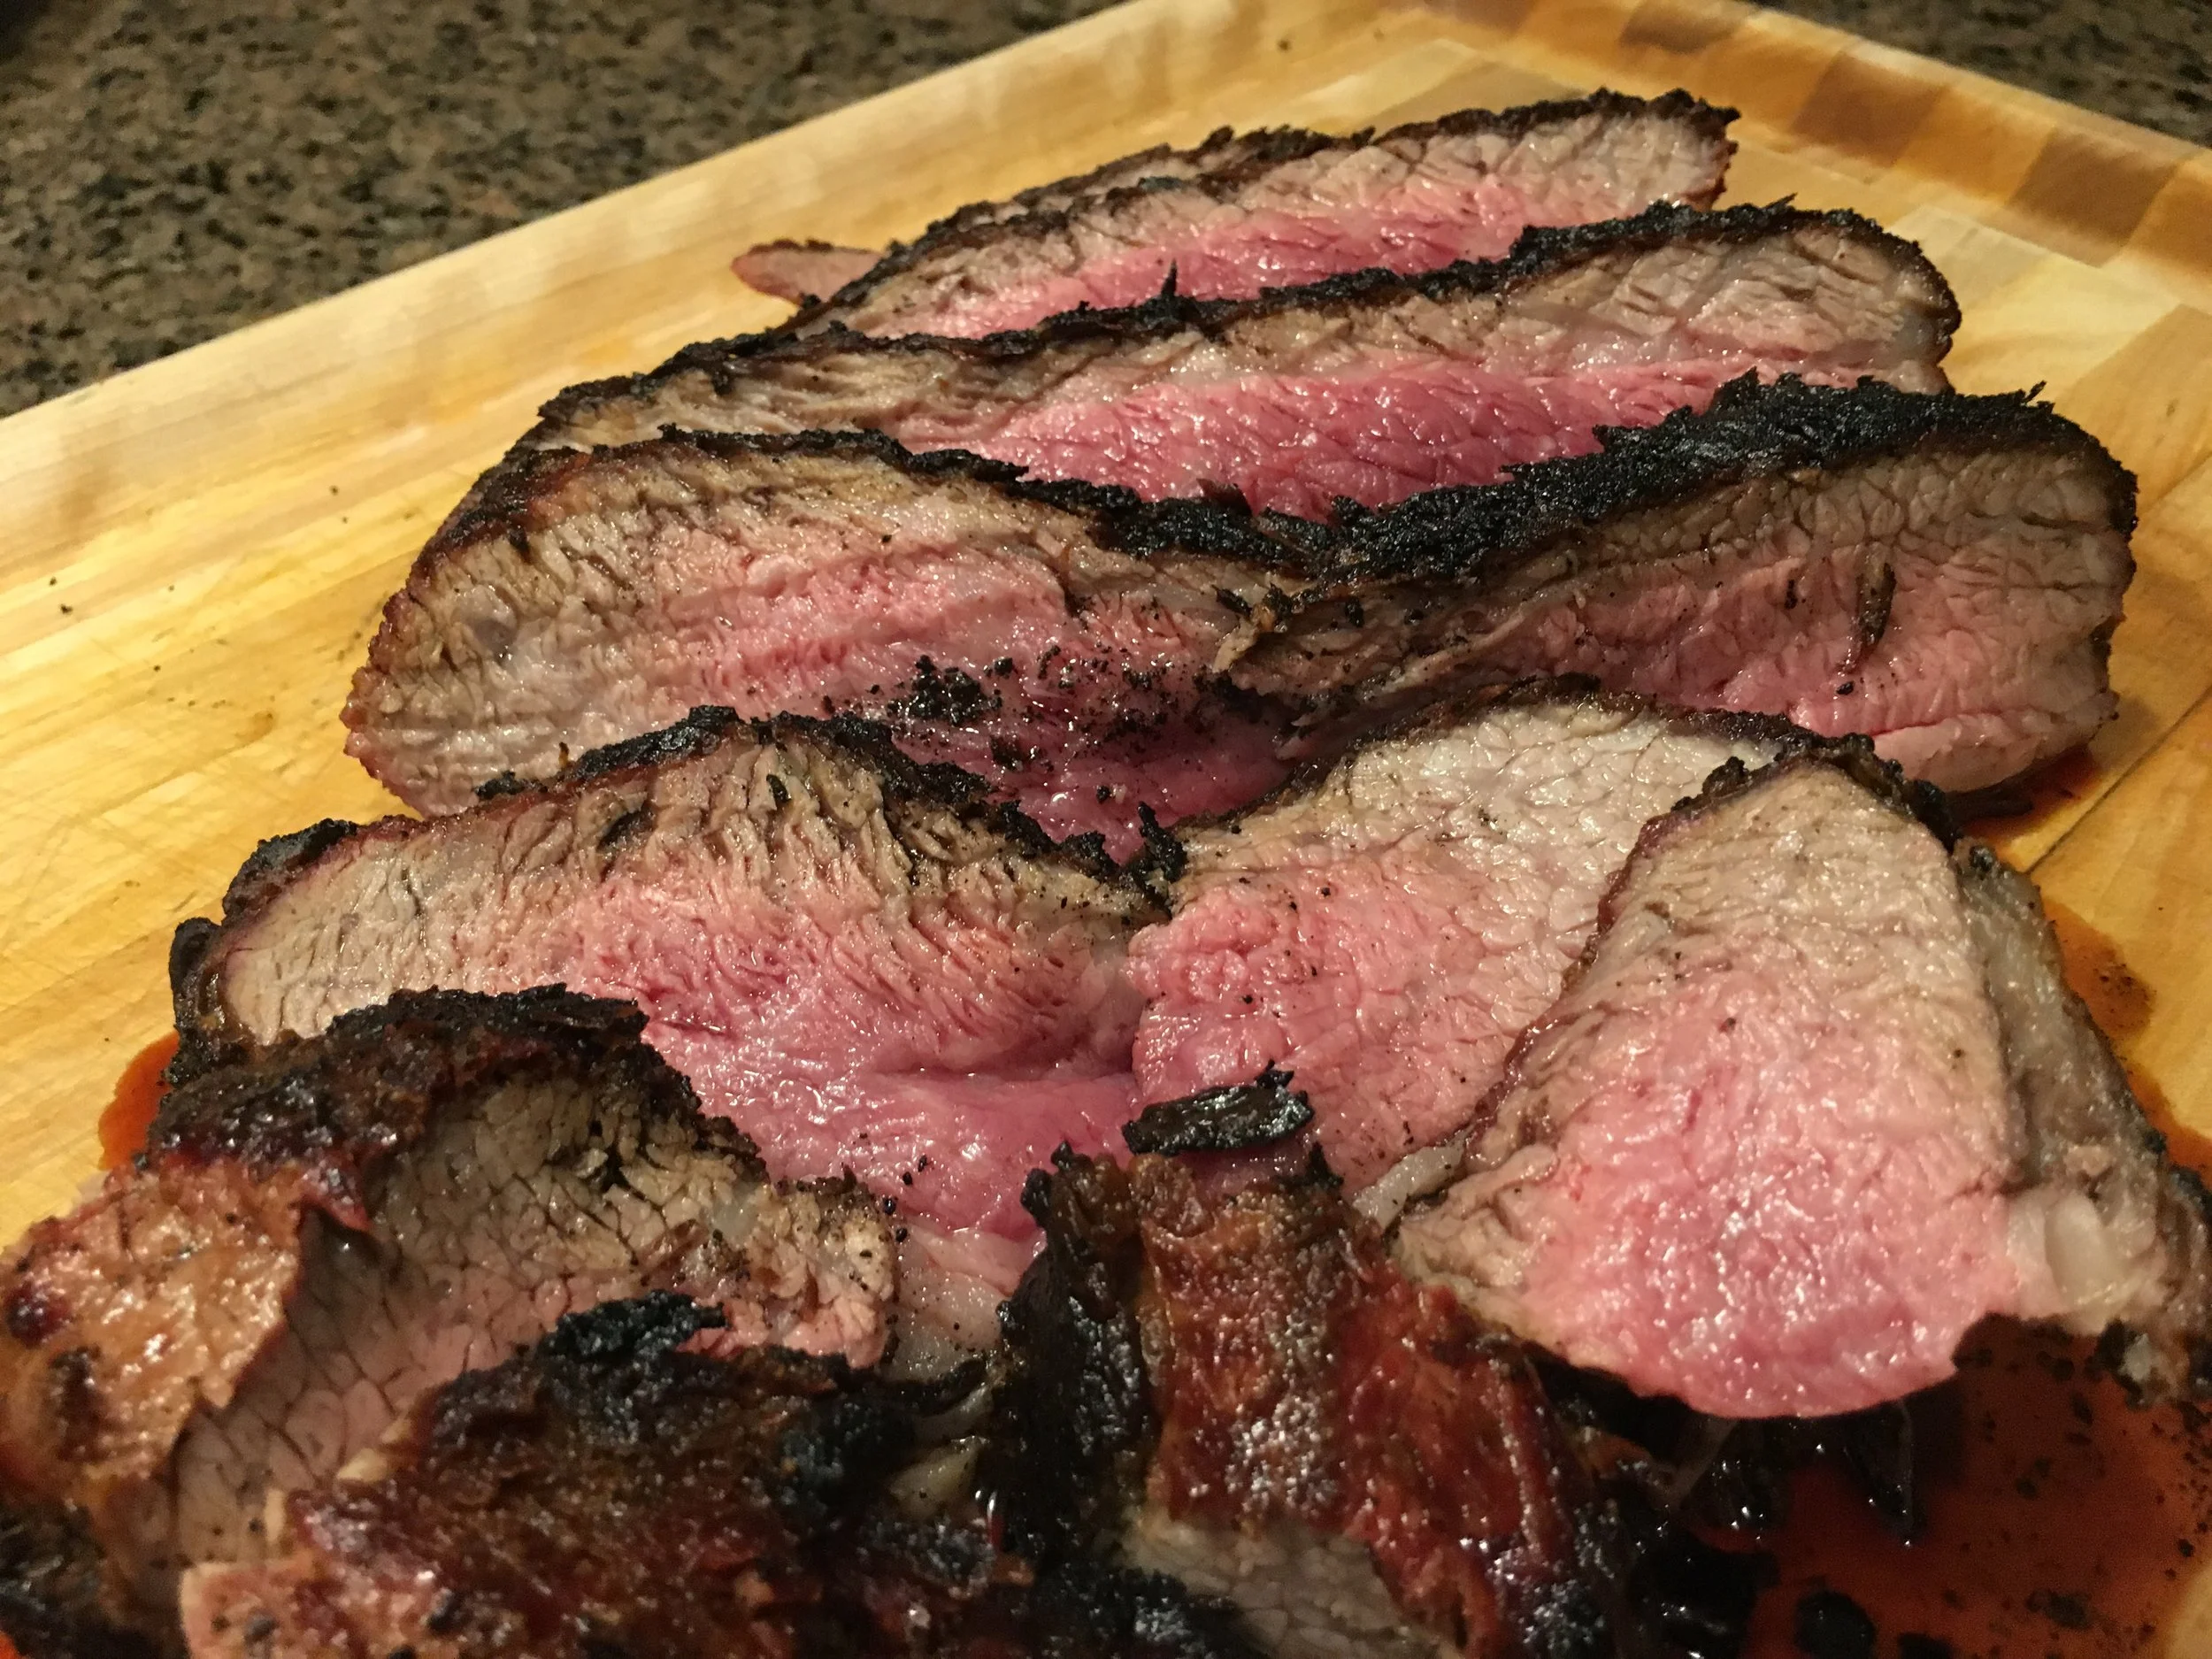
Slice the roast across the grain into thin slices. The tri-tip is an odd roast and you may have to change the direction of the roast as you slice it. It seems like the grain runs in different directions on opposite sides of the roast. You can serve the roast as is or as a sandwich. My recommendation for sandwiches is on garlic bread with melted provolone.

One other thing to note. Tri-tip isn’t super expensive and it contains less fat than most other cuts. This roast can serve two people for up to two meals. If you haven’t tried it yet, search it out - it is fantastic! I have seen it before at Trader Joe’s as well, already prepared Santa Maria-style. Let me know how yours turns out!

Enjoy!

Garlic, Rosemary and Thyme Pork Chops

Over the last year, one of my favorite meals to make has been pork chops. I love pork chops; seriously, I LOVE them!

I wasn’t always a fan though. Most of you have probably eaten broiled pork chops which were dry and cooked until they were well done. That is my memory too (sorry mom), but this past year, I feel like I have mastered the cooking of the perfect pork chop. It is quickly becoming my signature dish.

Grilled pork chops

Tom Colicchio’s cookbook, Think Like a Chef taught me how sear the chops on the stovetop first and and then finish them in the oven. The process is actually pretty simple:

  • Salt and pepper your pork chops - use more salt/pepper than you think so that you can get a nice crust.
  • Once your pan is hot, add about 2 tablespoons of canola oil. When the oil starts to glisten, add your chops and sear them on each side - about 2-3 minutes a side depending on how thick they are.
  • After you sear the second side of the chops, add about 2 tablespoons of unsalted butter, 3-4 whole garlic cloves and some fresh rosemary and thyme. Baste the pork chops with the melted butter (it will smell amazing) and then throw your pan into a pre-heated 400 degree oven.
  • Remove the pan from the oven and baste every 5 minutes. Check for temperature. The chops are done when the internal temperature reaches 145 degrees. Total cook time will range from 5-15 minutes depending on the thickness of the chops.
  • Remove the chops from the pan once at temperature and pour any remaining melted butter over the chops. Let them sit 5 minutes or so before serving.

I thought this was the perfect method for cooking pork chops, but recently tried the same approach on the grill. Before I give you the grilling steps, I want to talk about the grill and the charcoal. I never gave much thought to either of these things until our neighbor Dayton introduced us to the Weber Performer Deluxe Grill and Cowboy Hardwood Lump Charcoal. The grill is actually pretty simple - a standard Weber kettle charcoal grill fit into a stand. What sets this grill apart is the automatic gas start. It gets the fire going much faster and you never have to use lighter fluid - thank you!

The charcoal makes a huge difference. The flavor is really amazing. Search this stuff out - it is worth the extra effort! Believe it or not, Ace Hardware is where we have found this most often.

OK…back to the process:

  • First, get your grill hot - really hot! Brush both sides of you chops with canola oil and salt and pepper your chops.
  • Sear the chops on each side - about two minutes per side. Remove the chops from the grill and place a cast iron skillet on the grill. Let the skillet got hot, then add the chops back in (same approach as the Bobby Flay Rocks! post). Add the butter, garlic, rosemary and thyme. Don’t worry about basting.
  • The chops will take anywhere from 5-15 minutes to cook, depending on the thickness. They cook fast, so check them every 3-4 minutes until the internal temperature reaches 145 degrees.
  • Remove the chops from the skillet as soon as they reach temperature. Worry about the skillet later. Spoon any remaining butter from the skillet over the chops. Let them sit 5 minutes or so before serving.

Regardless of which method you use - stovetop/oven or grill/cast iron pan - these will be the best pork chops you will ever eat. All of those bad memories will fade and if you are like me, you will devour every inch of the chop down to the bone.

Most of you will freak out about the temperature recommendation. The new USDA recommendation on temperature is truly 145 degrees.

One last thing…

Make sure that you are using canola oil for this recipe, not olive oil. Because you are cooking at high temperatures, the olive oil tends to taste bitter as it burns. Canola oil is very mild and doesn’t burn at the same high heat.

Make sure you try this recipe and let me know what you think. Best pork chops ever, right?!

Enjoy!

Lemon Chicken

I have made dozens of lemon chicken recipes, but this specific recipe and the use of the cast iron skillet is definitely my all time favorite!  I had been wanting a cast iron skillet for about two years now, but despite all of my talking, I never actually got around to buying a pan. One day, Tony went to Farm and Fleet (yes, I said it - Farm and Fleet) and came home with bird seed and a cast iron pan.  The pan is awesome and I can’t believe I have lived without it for this long!

Here is the recipe:

  • 1 whole chicken, quartered (bone-in and skin on is going to give you the best flavor, especially with this pan)
  • Zest of 1 lemon plus juice of 3 lemons
  • 1 Tbsp dijon or whole grain mustard (trust me, you won’t taste the mustard for all of you haters out there!)
  • 7-8 “dashes” of Worcestershire sauce
  • 6-7 cloves of garlic, chopped
  • Fresh rosemary (3-4 sprigs for marinade; additional 2 sprigs used during cook time)
  • ½ cup olive oil
  • 1/3 cup chicken stock
  • Pepper
  • Salt

Mix the lemon zest, lemon juice (2 lemons), mustard, Worcestershire sauce, garlic, rosemary, pepper and olive oil in a mason jar and shake until all ingredients are well combined.  

Sprinkle the chicken pieces with salt and then place in a Ziplock bag.  Add the marinade. Massage the marinade into the chicken (with the bag closed).  Placed the bag on a plate and keep in the refrigerator overnight.

Heat a cast iron skillet until it is smoking hot!  Add enough canola oil to coat the bottom of the pan and then add the chicken (discard excess marinade) to the pan, skin side down.  Let the chicken cook at least 5 minutes.

Flip the chicken (skin side up) and let cook an additional 5 minutes.  Flip the chicken again (skin side down) and add about 3 tbsp of butter and additional rosemary springs.  Place the pan in a 400 degree oven and cook for about 20 additional minutes or until a meat thermometer inserted into a thigh/leg registers 165 degrees.  Remove the pan from the oven, place the chicken on a plate and cover with aluminum foil.  Place the pan on a medium high burner.

Add an additional 1 tbsp of butter to the pan and 1 tbsp flour.  Whisk the butter and flour together until completely combined.  Add 1/3 cup chicken stock and the juice of 1 additional lemon.  Continue to whisk until the sauce starts to come together.  Add additional salt/pepper to taste.  

Pour pan sauce over the chicken and serve.  I typically serve this with Tony’s Favorite Roasted “Guinea” Potatoes or risotto (recipes will follow later).

This same recipe can be used for any type of chicken.  You may need to reduce the browning time in the cast iron pan and the overall cook time.  You can also do this without the cast iron pan or even on the grill.  There is not an exact science to this.  Use what you have available to you and just adjust your cooking method until you get the right color on the chicken and the right temperature. 

Enjoy!